


High Speed Photography
Celebration Of High-Speed Photography
This post is supposed to provide you with some inspiration of what can be done with high-speed photography. It also showcases some truly stunning slow-motion videos.

DIY - High Speed Photography at Home
This guide describes how to capture super fast movements using ordinary camera gear and a little home made electronics. It describes the setup used, the common problems and what can be done to solve them.

Home-Made High Speed Photography (PDF)
Pictures of high-speed events such as popping balloons, breaking glass, and splashing liquids reveal interesting structures not visible to the naked eye. With this guide you can take your own high-speed photos to captures these ephemeral events. A very detailed tutorial.

Quick guide to Simple High Speed Macro Photography
This is a quick tutorial to get you started with high speed photography. There are tons of other resources on the web, but most of them are advanced and require special equipment. This one is simple and basic.

2. Tilt-Shift Photography
Tilt-shift photography refers to the use of camera movements on small- and medium-format cameras; it usually requires the use of special lenses.
“Tilt-shift” actually encompasses two different types of movements: rotation of the lens relative to the image plane, called tilt, and movement of the lens parallel to the image plane, called shift. Tilt is used to control the orientation of the plane of focus (PoF), and hence the part of an image that appears sharp; it makes use of the Scheimpflug principle. Shift is used to change the line of sight while avoiding the convergence of parallel lines, as when photographing tall buildings.
Another, less cost-intensive technique called “tilt-shift miniature faking” is a process in which a photograph of a life-sized location or object is manipulated so that it looks like a photograph of a miniature-scale model.
50 Beautiful Examples Of Tilt-Shift Photography

Tilt-Shift Photography Photoshop Tutorial
This tutorial was produced using Photoshop CS2 on a PC.

Receding Hairline
With very little effort, you can take existing photographs of everyday scenes and make them look like miniature models.

Free Auto Tilt-Shift Photoshop Action
Plug-and-play solution for preparing your photos.
3. Black and White Photography
Beautiful Black and White Photography
One of the most beautiful inspirational posts on Smashing Magazine, featuring over 50 brilliant works from photographers across the globe.

5 Black and White Photography Tips
A short, but useful article by by Darren Rowse, featuring shoot in RAW, low ISO and other techniques. You may also consider reading the articles Key Ingredients for Black and White Images

Black and White Photography Guide
Black and white photography starts before the shot is even taken. In this article you’ll find some quick tips on what to look for to ensure the perfect black and white landscape - e.g. camera settings for black and white photography and what filters are good for black and white landscapes.

Digital Black and White
This site features professional photography articles written by Keith Cooper. It covers black/white-photography-techniques, image manipulation techniques, tools, articles and camera reviews.
The Top 5 Black & White Photography Tips
Five handy tips to get you going in the right direction: practice, focus on contrast, focus on texture, use color filters and more. If you want to learn more about the actual black and white conversion process in Photoshop, see the article 12 Ways to Make a Black & White Photo as well.

4. Motion Blur Photography
45 Beautiful Motion Blur Photos
A showcase of motion blur photos. Motion blur is frequently used to show a sense of speed. You can artificially achieve this effect in a usual scene using cameras with a slow shutter speed. Also Adobe Photoshop can be used for this purpose, though sometimes images may look unnatural and unprofessional.

How to Capture Motion Blur in Photography
Capturing movement in images is something that many photographers only need to do when photographing sports or other fast-moving events.

Professional-Looking Motion-Blur Effect for Your Images
“In this tutorial we’re going to show you how to create a very popular motion blur effect used in many magazine and various other professionally crafted images.”

Photoshop Tutorials: Create Silky Smooth Waterfalls
“In this Adobe Photoshop tutorial, we’re going to look at how to give waterfalls a silky smooth appearance, as if the photo were taken with a longer exposure, which would normally require the use of a neutral density filter.”

Long Exposure Photos
Long exposure can be used to create very interesting photographs. It can be used, for example, to create a bright photo in low-light conditions or to create motion blur for moving elements in a photograph
5. Infrared Photography
40 Incredible Near-Infrared Photos
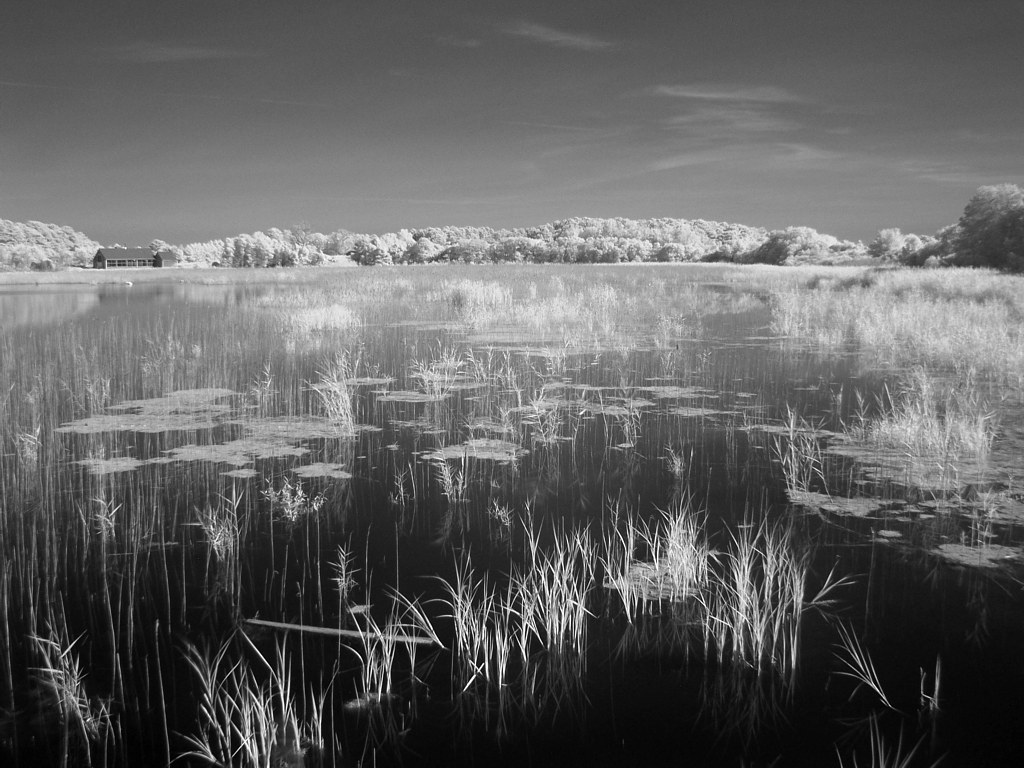
A showcase of near-infrared photography. Near-infrared images straight out of the camera do not always look good and are usually not as dramatic and beautiful as normally captured images. Hence, a lot of post-processing is done to enhance these images.

Infrared Photography with a Digital Camera
Thanks to digital photography, we can take infrared pictures whenever we please, mix them with “normal” ones and see the results on the spot, tweaking the settings to our heart’s desire.
InfraRed photography
A specialized IR portal, with gallery and forum.

LifePixel
Rich collection of manuals, how-to and do-it-yourself guides.

Beyond Visible
Website about IR, UV and luminescence photography. Here you can found plenty of theory and useful information about IR adaptors for flashlights. Among the resources is a huge collection of links related to invisible light photography.
Infrared (IR)
A gallery with a number of amazing IR photos.

Infrared photography
Huge article with a number of useful links. Nearly complete list of IR filters and digital cameras that can be updated for IR shooting.
6. Night Photography
60 Beautiful Examples Of Night Photography
60 amazing examples of night photography, created by some hard-working and dedicated photographers. Take a look at their websites and portfolios.

The Nocturnes
The Nocturnes is an organization dedicated to night photography. Founded by Tim Baskerville in San Francisco in 1991, it has grown to become the premier source of information and education on night photography, as well as an international community for night photographers.

Lost America night photography
Wandering the deserted backroads of the American Southwest, Troy Paiva has explored the abandoned underbelly of America since the 1970s. Since 1989 he’s been taking pictures of it… at night, by the light of the full moon.

Long Exposure Night Photography
This article shows you how to take pictures of night scenes with no moving objects.

Night Photography by David Baldwin
Night photography of landscapes and architecture.
“Strangers in the night”
How-to guide for night photography with point-and-shoot cameras.
(removed due to errors)
Some solutions for avoiding typical problems with night photography.
Learn Night Photography
Quick and dirty guide to defining exposure time for typical night subjects.

Night Landscape Photography
Capture stunning landscape images during the black of night.
7. Smoke Art Photography
Smoke Photography and Smoke Art
A round-up of some of the best examples of photos and artworks where smoke dominates.

Smoke Art Photography - An Introduction
This articles features smoke art photography tips from Stoffel De Roover; it describes the typical setup, important techniques and necessary adjustments for a perfect smoke art photo.
Smoke Art: Professional’s Notes
Personal photography notes from Graham Jeffery that are part instruction, and part a description of his own technique, and a few things that he has discovered along the way.

Photographing Smoke
The interview with Graham Jefferey, of Sensitive Light fame (see the link above), with interesting insights into practice and handy tips and tricks. Learn how to get the smoke right, how to set up the perfect lighting and exposure and how to manipulate images digitally.
How to photograph smoke - Photography podcast
This podcast talks about how to photograph smoke in a professional way. It discusses photographing different types of smoke including incense, outdoor smoke and liquid nitrogen.

How to: Smoke Photography
This simple guide describes a set up for smoke art photography.

Smoke photography video tutorial
Video tutorial on smoke photography.
Make: How-To Smoke Photography
Learn how to create and shoot sculptures made with smoke and how to paint with smoke.

8. Macro Photography
25 Beautiful Macro Photography Shots
A round-up of some truly revealing and inspiring macro photographs which are sure to have you marveling at the world around you.

Macro Photography
How to take close-up pictures of small things, by Philip Greenspun

Introduction to Macro Photography
Set-up and camera settings for macro photography (8-minute video).
Reversing Lenses for Macro Photography
A guide to building a lens for extreme macro shooting.

Woven Shadows
Digital photography video tutorial (48 MB).
Macro photography
A round-up of gadgets that will help you move really close to your subject.
Captain’s European Butterfly Guide
Engaging guide for this special kind of hunting (of course, you can use it outside of Europe, too).
Macro Photography Tips for Point and Shoot Digital Cameras
Most of the articles here are geared to DSLR owners. But they are also useful for macro photography with compact cameras, too.
Extreme Macro Photography on a Budget
DIY extreme macro lens with a Pringles container.

Macrophoto Journal on deviantART
A number of excellent photos, forums and technical articles.

Macro Photography Tutorial
Short review on insect shooting, and amazing photos by M. Plonsky, PhD.

9. HDR
If you don’t like these kinds of photos, please move along. No complaints will be accepted.
35 Fantastic HDR Pictures
This post covers 35 beautiful and perfectly executed HDR pictures. Some of them may look surreal, too colorful, even magic or fake, but they are not. Keep in mind that they’ve all been developed from normal photos; not a single image is an illustration.

HDR Tutorial
HDR how-to guide, mostly related to Mac users.

HDR: High Dynamic Range Photography
HDR how-to guide with Photoshop CS2
In-Camera HDR detailed tutorial
YouTube video tutorial

My HDR Tutorial
Clear tutorial on using your digital camera, Photomatix and Photoshop, by Markus Linke.

HDR tutorial
Tutorial on HDR with free-of-charge software GIMP and Qtpfsgui

HDR Tutorial
Tutorial on HDR with Adobe Lightroom, Photoshop CS2 and Photomatix Pro

10. RAW Processing
A raw image file contains minimally processed data from the image sensor. Raw image files are sometimes called digital negatives, because they serve the same role as negatives in film photography. But unlike negatives, these files need much more processing.
RAW vs. JPEG: The Real Story
You can take the RAW image file and make all of your choices about size, color, contrast, etc., and then output it to a new original each time (which might be a JPEG). This is greatly aided by the fact that there’s 12-bit color. The software can make easier choices and less compromises.

Digital camera RAW converter comparision
This article is not an in-depth analysis of seven different programs. The goal is to give the reader an overview of each program’s features and capabilities and to provide reasonably accurate image comparisons. With Canon 1Ds Mk II, Canon 400D XTi, Canon 50D and Nikon D300 images

Choosing RAW Image Processing Software
The most expensive multi-function RAW processing software is not always the best for converting the wide range of current RAW image file formats.
RAW Processing Workflow Using Phase One’s Capture One 4
Capture One 4 is more than just a rewritten version of Phase One’s Capture One LE. It offers improved speed and quality of RAW conversion, and it builds on its strengths as a RAW-processing workflow tool.

Aperture, Lightroom and Capture One review:
A full-range review of three of the most popular and powerful tools for RAW processing
Lightroom Presets: The Ultimate Free List
“The biggest, most updated list of free Adobe Lightroom presets. It’s true you can have too many, but this is the best jumping-off point for finding new presets. Taste as many as you like, then tell us your favorites.” Note that the presets don’t work with RAW and JPEG files the same.

11. Panoramic Photography
A panorama - or panoramic photo - is usually made by stitching several pictures taken with the same camera into one.
How To: Panoramic Photography
Making a panoramic photo really is only taking the pictures, stitching them together on your computer. The more effort and attention you put into the first step, the easier the second step will be and the more realistic your final photo will look.

Taking Panoramic Landscapes - The Easy Solution
Panoramas have a reputation for being hard to take. Dedicated panorama cameras are available, but unless you’ve got at least $1000 to spare, you probably can’t afford one! But you can take panoramas with any kind of camera.

Digital Photography Tutorial - Panorama Stitching
“Many digital cameras, even some budget-priced pocket compacts, have a feature known as “Panorama Stitching” mode. If you haven’t experimented with it yet, it is designed to help with a particular type of photograph, or rather series of photographs, in which successive shots are taken as the camera is panned across a scene.”
Building Panoramic Images in The GIMP
Panoramic landscapes make for some amazing photos. There’s nothing like the relaxation and tranquility felt when gazing over the sweeping wilderness, save for the hassle of actually getting there. Using a digital camera, it’s possible to stitch photos together to simulate the expensive effects of a landscape filter.
The easy way is to use Pandora. Pandora is a plug-in for The GIMP that tries to match the edges of the photos, using a best guess at where one photo ends and the next begins.
12. Special Issues
Architecture photography, a beginners’ guide
Insightful tips for photography of stationary subjects by Michael Jenkins. You may also want to learn how to shoot bridges, statues, buildings and piers.

Guide To Architectural Photography
Despite architecture’s diversity there are a number of simple rules that apply in most situations, or will at least get you thinking more deeply about how you can best portray a particular piece of architecture.

Fixing photos shot from airplanes
One of the cool things about getting a window seat in an airplane is that you get a unique opportunity to photograph things from a high vantage point. On the flip side, when you get home, you often find the photos look washed out and the color poor. Luckily, there is not much that Photoshop can’t recover, provided that the photographs are in focus.

DIY Lighting Hacks for Digital Photographers
“Lighting can be the difference between a good shot and a great one. Walk into most professional photographers’ studios, and you’ll be confronted with truckloads of lighting equipment. To the average hobby photographer, it’s enough to make your mind boggle - and make your stomach turn as you think about the cost of it all.
In this post, I’ve found 10 DIY flash and lighting hacks that put some of these lighting techniques within the grasp of the rest of us.”

Lighting simulator
A great tool to plan and test your portrait lighting with one light source, with fill light if wished

FAQ: Photo Filters
Optical filters function in digital photography much as they do in film work. Properly used, they can condition the light entering the camera in favorable ways - often in ways that post-processing can’t easily duplicate.
10 Top Photography Composition Rules
This post reviews important rules of good photography, such as Rules of Thirds, balancing elements, leading lines, symmetry and patterns, viewpoint, background, depth, framing, cropping and experimentation.


